
If your AC won’t turn on and you feel like you’re about to lose your mind, then it’s probably time to check out this post. We’ll walk you through how to troubleshoot your air conditioning unit and make sure that you’re able to get back to doing what you need to do.
Air conditioners can be frustrating. That’s why we want to help you diagnose and solve some of the most common issues you may encounter with your AC unit. Here are some of the most frequent problems you might run into with your AC unit, along with tips on how to troubleshoot and repair them.
The Air Conditioner unit won’t turn on could be due to a lot of reasons. If the unit is not turning on at all, then something is wrong with the circuit breaker or fuse. If not, it could be a problem with the thermostat or the unit’s inbuilt protection feature.
Air conditioners, or ACs as they are more commonly known, are essential to surviving the high temperatures and humidity of Florida. When your AC breaks down in the middle of a heatwave, it can feel like your lifeline is disappearing right out from under you.
But before you panic and start wondering how you will endure the rest of the week, remember that there are several things you can do yourself to troubleshoot your AC and get it blowing cold air again — without calling an expensive professional.
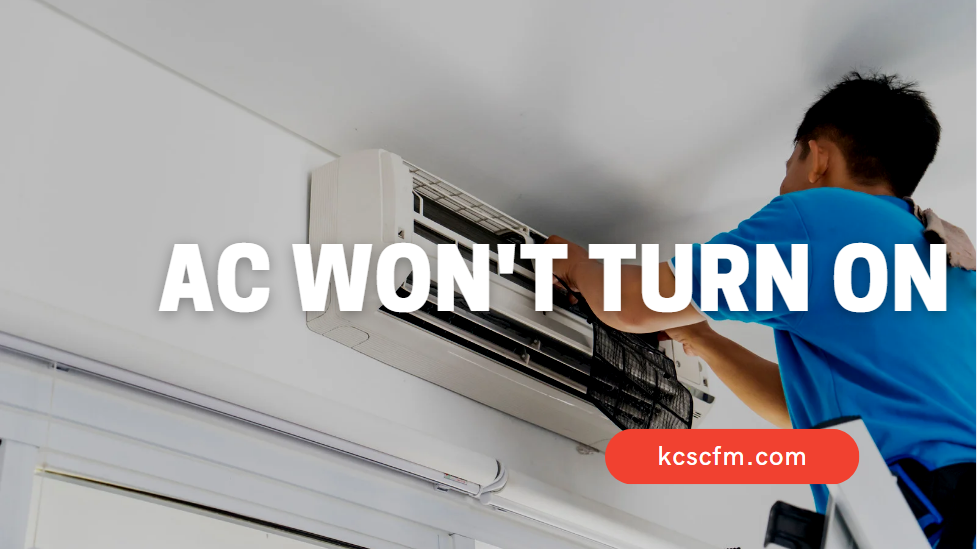
AC Won’t Turn ON – Troubleshoot And Diagnosis
Frustrating, isn’t it? When your AC won’t turn on (especially during the summer), it’s easy to bypass any feelings of serenity and go straight to panic mode. Don’t fret just yet.
Checking a few basic parts of your unit can help you identify the issue and get back to enjoying cool air quickly — saving you time, money, and frustration in the process.
Troubleshooting common AC problems is simple enough for anyone to do — even if you aren’t familiar with air conditioning repair or refrigeration systems in general.
1. Thermostat Problem
AC Unit not working? Don’t panic.
First, check the thermostat settings. The AC should be turned on and in cooling mode. If it’s still not working, change the batteries in your remote or try resetting the thermostat.
The thermostat is like the bridge between your home and your air conditioning unit. If it is malfunctioning, there is no way for the AC unit to receive instructions.
First, you should check if the thermostat settings are correct and if it’s set on cooling or heating. Also, make sure to check the time and date — there have been reports of misfires in certain regions due to insufficient daylight savings. Finally, replace the batteries if they’re low; some people were seeing blank screens as a result of simply dead batteries.
The thermostat displayed on the screen cannot be controlled because the unit is defective or has lost power. This may indicate a problem with internal wiring, and you will need to call in a professional.
If your thermostat still won’t switch on, it could be a sign that you need a new thermostat. Luckily, all you’ll need to do is book an appointment with a local heating and cooling expert. HVAC technicians can quickly come in, have a look at it, and determine the problem. If there’s an electrical problem with your thermostat, they’ll replace it for you and ensure everything works how it should!
2. Check Circuit Breaker
When switching too many electrical devices on at once, a circuit breaker will trip. This happens because there not enough power to the house.
The first thing that you should check when a circuit breaker trips is your appliance load. If there are too many appliances on one circuit, you may need to upgrade your wiring or add a new 15-amp breaker. Also be sure to check for frayed wires and replace them before using the appliance again.
Power surges or power outages can also trip a circuit breaker.
Air conditioners can trip a circuit breaker because they use a lot of energy and power so resetting the tripped breaker is necessary in order for your air conditioner to work normally again.
Resetting the circuit breaker will allow it to work again and stop tripping. Here are the steps:
To reset a circuit breaker, flip the switch to the “off” position and then “on” again. Some breakers may reset with a simple flip, while others might require you to press the reset button first. If your air conditioner still doesn’t work, call a professional for help.
Once your circuit breaker is reset, you’ll know if it’s to blame for tripping or not. If you notice flickering light bulbs as more appliances are turned on, then there might be a short-circuit caused by faulty wiring causing the problem. If not, try limiting how many appliances you use at once and see if that fixes the issue.
When you have an old home, it’s important to not take anything for granted. Electrical problems are often hidden until they cause a major issue; this is why assessing your electrical system and wiring regularly is so important. Remember to never flip circuit breaker switch twice in a row: if the problem still exists, there might be something wrong with your system that could start fires if left alone.
Check out our solution on Why Frigidaire AC won’t Turn ON.
3. Drain Pan Is Full
If the AC suddenly stops working, check if there’s a drain pan underneath the unit. The drain pan will have to be cleaned from time to time, as it catches any water that seeps from your HVAC system.
Many AC units will also come with a float switch or wet-switch (short for “wet and dryer/dry contact”) which stops your AC from running when this cleaner is full.
4. Blown Fuse
The fuse box plays an important role in your home’s electrical system. It is typically located on the outside of your home, near the air conditioner condenser unit. The fuse box contains fuses that protect your home’s electrical circuits from overloads. If a circuit overloads, the fuse will “blow” and stop the flow of electricity. This prevents damage to your home’s wiring.
NOTE: As with any electrical equipment that you’re going to be working with, safety is a priority. We recommend that you turn off the AC unit and electrical supply before beginning work on your fuse box.
First, turn the A/C off and make sure that you have proper ventilation. After the fuse box cover is removed, the fuses should be labeled on the inside of a metal box. If there are no labels, use a screwdriver to check each one.
If there are two fuses in one slot, use a screwdriver to push them together so they fit more snugly into the slot. The slots may contain other wires such as power or cable television lines; if this is the case, you will need to re-insert those items into another spot after fixing the problem.
Checking for a blown fuse is one of the common methods to troubleshoot an electrical component. However, there are many steps to check before you can begin to assess this problem and decide on your course of action.
First, you’ll need to find the fuse box and identify which breaker controls the power supply to your air conditioner. Once you’ve found it, turn off the power supply by resetting the breaker switch back into a safe position.
After that, inspect the wiring and follow along until you find a burnt-out fuse. Replace it with one of equal amperage and re-secure everything afterward — so that no other fuses get blown out in the future.
5. Condenser Unit Is Unplugged
If you notice your AC isn’t turning on, make sure its plugged into the socket. If the cord is damaged, you’ll need to replace it immediately to avoid overloading your circuit. If this doesn’t work, get your AC serviced.
Open the panel found on the side of your home and inspect the wires connected to it. The AC might not be plugged in, especially if it’s a window AC unit. Check that all cords are properly attached and look for any signs of chewing or other damage.
Damaged parts may have to be replaced. If you don’t understand what you’re seeing, ask a professional for help — making sure your AC is up-to-date will save you money on utility bills and keep everything running smoothly.
6. Clogged Air Filter
When’s the last time you changed your air filter? If it’s been a few months or more, then you’re putting your AC at risk.
It may already be working hard to keep your house cool and clean, but that extra layer of dust and debris makes all the difference in airflow, performance, and temperature. That’s why it’s crucial to replace your filter any time you notice it getting dirty or damaged.
Changing your air filter regularly is easy. If you have a fixed-size filter that sits inside the outer housing of the unit, simply unscrew it and replace it with a new one.
To avoid the low air flow or cool air feeling, it is recommended that you clean your AC unit at least once a month. It’s best to clean it on a day when the electricity will be off for several hours so that it can dry completely.
If you are in a hurry, you can use a blow dryer on its lowest setting to speed up the drying process.
If you have a pleated or disposable filter, check the instruction manual before replacing it to avoid damaging the AC unit motor. Regardless of which type you have, make sure to buy filters that are specifically made for your brand and size of system. They should fit right into place when you remove them from their packaging.
7. False Temperature Readings
If your thermostat is located too far away from the heating or cooling source, it can get a false reading of the temperature and shut off automatically in an attempt to keep you at the desired level of comfort.
If this happens, then you will need to install your thermostat in a new location — somewhere near where the majority of heat or cool air enters your home.
8. AC Drain Line Is Clogged
A clean condensate drain line is the sign of a reliable air conditioner. If the line isn’t kept clean, the AC will eventually become overloaded with moisture and clogged with gunk, experiencing short-circuits that can cause natural gas leaks and pose serious fire hazards.
Be sure you clean your pipe line every month by pouring a cup of boiled water down it to flush out any dirt before turning off the unit.
After doing this, you will want to clean the drain line out with a length of PVC pipe and a tooth brush. Keep your drain line as short as possible. The shorter the drain line the less water will be sitting in the drain line evaporating into your building.
9. Refrigerant Leak
If your AC stops working properly, you might think it’s time to buy a new one. In reality, there can be several reasons why this happens. A simple refrigerant leak is one of them.
You can know that you have a refrigerant leak before your AC stops turning on by observing several different signs. If your AC isn’t cooling your home and your electric bills go up for no apparent reason, you likely have a refrigerant leak. If you hear a hissing sound coming from the AC while it’s turned off, there’s a high chance of a refrigerant leak.
A refrigerant leak can be potentially dangerous for anyone in the vicinity of a faulty AC unit. Leaking gas is poisonous, and it could lead to refrigerant poisoning — resulting in severe illness or even a fatality.
To ensure safety, the government mandates that only certified technicians make changes to air conditioning systems, and those technicians are limited to purchasing certain kinds of refrigerant.
10. AC Motor Failure
The capacitor is the part of your air conditioner that gives it a pulse of energy to turn on after the temperature gets too high. If your unit is 15 or 20 years old or older, then you have come across a common problem — a faulty, dying capacitor. To find out if this is the problem, grab an AC multimeter, then turn off your air conditioner and disconnect its power source.
A capacitor is a small electrical device for storing energy. When you turn on your AC, it starts up with an electric current — and this current charges the capacitor. The sudden power surge will blow out a bad capacitor, which makes your AC stop working altogether.
Plug in your multimeter and test the capacitor by looking for 240V between its positive and negative terminals. If there isn’t any voltage detected (or something significantly low), then you’ve found the issue!
Taking out the capacitor with a multimeter (a tool used to test electrical circuits) will let you know whether or not it’s faulty. After that, if testing does show that it works well, you can rule out the capactitor as an issue for your defective AC.
Final Thoughts
If your air conditioning unit is acting up, there are a few important things you should know. First of all, it’s not necessarily an issue with the product — solutions to most problems can be found online or in a user manual attached to your product.
You may know a lot about your AC unit. But it’s not uncommon for homeowners to misinterpret the cause of an air-conditioning problem or to fix what another repairman has messed up.
That’s why we recommend calling in a professional — at least every two years — to ensure that your cooling system is running safely, efficiently, and quietly all summer long.
To ensure that your AC system runs as smoothly as possible, you should schedule regular inspections and maintenance procedures. According to HVAC experts, routine services can be a simple way to make sure your system can work effectively for years to come — reducing energy bills and keeping your home or business at a comfortable temperature.

Hi there! I’m Sam Hendricks, and I’m a repair technician and expert. I created this website to help people like you save money and time by fixing your own appliances.
Over the years, I’ve seen people spend a lot of money on unnecessary repairs or replacements. That’s why I decided to share my expertise and create easy-to-follow guides for fixing appliances on your own.