
This article will feature various methods for cutting vinyl flooring planks. These techniques have been used for installing vinyl plank flooring underlayments to achieve the required measurements with a suitable tolerance.
When it comes to installing floor-coverings either in your house or business, one of the most frequently used options is vinyl flooring. It is a versatile option, and has several benefits over its competitors. For example, it is easy to clean, it doesn’t get stained as easily and can be installed over almost any surface.
Choosing vinyl flooring for your home is a great choice. Vinyl flooring can be very easy to install and it gives you a lot of choice for color, style and design. Vinyl flooring is very durable, so you don’t have to worry about the kids or pets damaging it or leaving marks on it.
You can cut vinyl plank flooring with a utility knife, hand saw, circular saw, table saw, miter saw, jigsaw, or a Dremel depending on the size of the material. And it’s not as hard to install as you might think.
When you want a classic, sleek look for your flooring without the hassle of heavy hardwood and with an elegant, low-maintenance style, vinyl is the way to go. This floor covering comes in a thin plank format that resembles wood planks. The look is elegant and easy to maintain — though cutting it can be tricky!
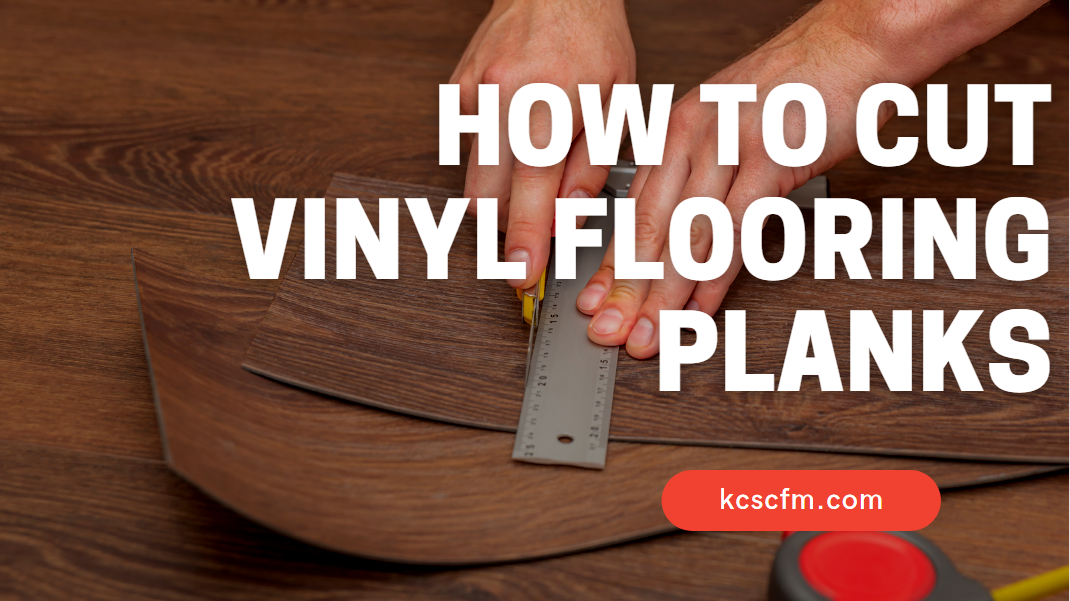
How To Cut Vinyl Flooring Planks – Best Methods And Tools
Vinyl plank flooring has become a popular option for people that are looking to do a remodel or someone looking for that new house feeling. However, you should always check your local hardware store when purchasing your vinyl plank flooring.
The special nature of vinyl plank flooring often confuses DIY’ers, so we want to take some time today and show you the different steps it takes to successfully cut this material at home.
There are many issues that may arise if you try to cut vinyl flooring. First of all, not all blades are made the same so you might end up with jagged edges or cause the tongue-in-groove edging to chip off. Some blades might even crack or split the planks — no matter what, you’re going to have a bad time.
Flooring that’s easy to install and work with? It’s not just a dream — it’s vinyl plank flooring. Vinyl plank is easier than ever to install, so you can keep your new floor looking its best without needing to call a professional installer. If you’re ready to get started, here’s what you need to know about installing vinyl plank flooring on your own.
When you’re installing flooring for your automotive project, you’ll find that there are very few tools made specifically for the job. It’s important to use the right tool for the job, but sometimes you have to improvise and get creative.
By Using Utility Knife To Cut Vinyl Plank Flooring
A utility knife, also known as a box cutter, is the one tool that anyone installing flooring will immediately turn to. The small, handheld instrument features a handle and an attached blade that can be drawn across planks of hardwood or vinyl flooring to make cuts.
It works well because it can score the vinyl, and then you can bend it up to snap the vinyl into two pieces.
Score and snap is a widely used method of cutting vinyl planks. It can be used effectively on a consistent basis, but it is important to use the right blade and to score at the right angle so you can complete the snap without damaging the edge of your planks.
While it’s tempting to just grab a utility knife and quickly cut through your vinyl planks, this method is far from ideal. When using the score-and-snap method, you can expect uneven edges or jagged breaks. Issues like these can cause the plank to get stuck in your flooring.
When cutting vinyl planks, make sure to use a steel or wood handled utility knife. The grip will help you exert enough pressure to get deep enough into the vinyl plank for a clean, professional cut.
We all know that the best cut comes from the best tool. Don’t use a cheap, plastic handled utility knife or one that uses snap-off-type blades; they are not as sharp as regular utility knives and will leave you with an uneven cut. For clean cuts every time, invest in a quality blade and handle.
By Using Tile Cutter To Cut Vinyl Plank Flooring
A tile cutter can make the work of cutting vinyl plank flooring fast and easy. This simple manual tool is a basic but useful addition to any layman’s toolbox. It comes in three pieces: a blade, an axle or roller, and an adjustable handle that fits over the axle. The blade is made to make straight cuts, while the roller is for curves; the axle spins as you cut, providing pressure for clean cuts without damaging the vinyl.
A tile cutter is the best tool for cutting tiles. Tile saws use a diamond-edged blade to cut tiles deep into the surface and this can cause chipping. Chipping is bad because it’s unsightly, and with ceramic tiles it can cause cracks which are even worse and can spread like wildfire along the entire surface of the tile. This fault line along which the tile will crack and break off without cracking the rest of the tile.
In the tiling process, a tile cutter can be used to cut vinyl plank flooring. However, you have to have the right kind of tile cutter to do this.
Using a ceramic tile cutter to cut vinyl plank flooring will result in a number of problems. It’s unsafe because the blade is not made to cut deep into the floor. It won’t score the vinyl, and it will crack the vinyl instead. The result will be uneven edges and a shattered floor.
In order to successfully lay vinyl plank flooring, a ceramic tile cutter is unsuitable. Although ceramic tile cutters use diamonds as their blades, these are not made for deep cutting and can crack or damage vinyl flooring if it is used to cut the material.
Vinyl itself is a soft material that can be dented or damaged by harder materials like stone, so please consider a specialized vinyl plank flooring cutter when working with this type of flooring.
If you’re using a guillotine-style blade, then this type of blade is particularly effective for cutting through vinyl planks. While it doesn’t always go all the way through the backing, you’ll find that you can easily trim it with a utility knife — making sure that every cut is clean and accurate.
By Using Table Saw To Cut Vinyl Plank Flooring
To make custom-sized vinyl flooring flooring, you need a table saw. A table saw is used to cut the planks of vinyl along the length of the planks, known as ripping, since the plank is essentially being ripped apart. Ripping cuts are normally made where the vinyl meets the wall.
Even if you’re installing flooring in tight spaces, the table saw will become your best friend. Essentially, a table saw is like an arm extension that allows you to cut wood more accurately and safely than with a handsaw. And even if it takes a few tries to get the hang of it, you can save yourself a lot of time with this handy tool.
Rip cuts and crosscuts are the two main things to know when performing cuts on table saws. A rip cut is when you want to make material wider, such as for a table top. A crosscut is used when you want to make material shorter, like for a fence in your garden.
Vinyl flooring is a great way to open up your home, as it’s easy to install, waterproof and can be used in any room of the house. One of the most basic installation techniques is the Stagger-Cut method. In this method, you simply stagger different lengths of flooring to give the effect of a longer strip and create the illusion that there is less room between each plank.
When using a table saw to cut vinyl planks, it’s important to switch the blade for a fine-tooth blade. Cheap blades are much rougher than high-quality blades and can cause the vinyl planks to come out rough and not cut cleanly. The smooth edges will be important for easy install.
A blade with a fine count of teeth per inch(TPI) will be able to give you a cleaner, smoother cut than a blade with a lower TPI. For instance, if you’re cutting 33rd inch plank tile, the fine-tooth blade will be able to make the cut in one time through the plank.
Choose a table saw blade with a positive rake angle when cutting vinyl plank flooring. This will give you a smoother cut and reduce the amount of tearing or chipping that occurs when you’re using an aggressive material like vinyl.
By Using Saw To Cut Vinyl Plank Flooring
When it comes to getting work done, it’s always important to bring the right tools. If you’re ripping through a vinyl plank you’ll need a saw with relatively fine teeth that won’t do damage to the plank and leave a clean cut. Avoid using a rip saw, which is designed for cutting rough wood.
A handsaw is any saw that runs on human power to cut wood. A finish cut saw has fine teeth that can leave a smooth cut surface after the cut. A hacksaw has coarse teeth for cutting metal and can be used for cutting wood. The two are used for different purposes, but are both very useful in their own way.
A flush cut pull saw also has teeth that are designed to cut through wood, so you can use it on other projects as well. The teeth ensure that your cuts are smooth and clean, giving you professional-looking results each time.
Using a handsaw is a slow and inefficient way to cut vinyl planks. While it is possible to use a saw, the process of using one will substantially increase the time that it takes you to install your plank flooring. In order to cut vinyl planks quickly, it is necessary to have access to an electric saw that is capable of cutting this material.
By Using Jigsaw To Cut Vinyl Plank Flooring
Using a jigsaw, you can cut vinyl planks or any other type of material. A jigsaw is essentially a power tool that allows you to do various types of cuts with different degrees of precision and control.
When jigsawing vinyl plank surfaces, it’s important to choose the right blade. Blades intended to cut soft materials may slide off of the surface; in this case, a blade designed to cut hard materials is needed. Be sure to select a blade that is specifically made for cutting vinyl planks — the surface of these floors is soft enough that the wrong blade can ruin it.
For the best cuts with a jigsaw, look for blades that have fine teeth and aren’t as aggressive. That way, your cuts won’t be rough and you won’t end up damaging your material.
Jigsaw stands out as the best tool for cutting vinyl flooring, since it is versatile enough to take on any task and can do all of the cutting you need with just one device.
The tool tends to be slow when it is used to make rip cuts, but makes smaller cuts like the crosscuts easily. It does a great job with crosscuts, but small cuts along the length of the vinyl planks are better done with a jig saw blade.
The jigsaw is a very useful tool that can be used to cut out holes in vinyl flooring planks to accommodate objects and fixtures. They are used especially when cutting around door frames, pedestals, toilets, and so on.
The jigsaw is a versatile tool that’s perfect for home improvement projects. Whether you’re cutting a straight line or a curve, the jigsaw can handle it all. It’s easy to adjust and simple to use, making it the best power tool for flooring tasks.
A narrow blade jigsaw is ideal for intricate designs. With a less powerful motor and a more narrow blade, tighter curves can be cut with precision. A wider blade may struggle to get into smaller spaces or the blade may dig into the wood undesirably.
Cutting planks with a jigsaw can be messy, but there are steps you can take to avoid making a huge mess. First, find a well-ventilated space with good lighting. Second, cut over an old pillowcase or some other kind of cloth so wood shaving and sawdust don’t get all over your workspace. Finally, wear gloves to protect your hands while they’re exposed to the sharp, hot pieces of wood.
By Using Miter Saw To Cut Vinyl Plank Flooring
A saw is only limited by the imagination of the craftsman, the sawyer. The table saw makes straight cuts. A radial arm saw with a dado blade makes cross cuts and dados. A jigsaw can make curved or straight cuts. And a miter saw can make accurate cross-cuts at any angle from 0-90°, making it an indispensable tool for cutting vinyl planks.
A miter saw is a convenient tool to use if you need to cut certain boards, but it’s not the right choice for everyone. For example, when you are working with wood and you want to make angled cuts or cut your material into smaller pieces, a miter saw is a great tool for that.
A miter saw is a power saw with an adjustable blade that makes accurate cross, or miter, cuts in wood. A table saw has a fixed blade and doesn’t tilt. A miter saw can also make bevel cuts at any angle you need for crown molding, picture frames, and other angled cuts.
The miter saw is a necessity for anyone who wants to install vinyl flooring on their own. With its ability to cut angles and make crisp crosscuts, it’s a great tool to have in the arsenal. The tool will limit how you can cut your flooring, but with a little creativity you can extend the versatility of the power tool.
The one cut a miter saw can’t do? Ripping boards. Because the blade is aligned at an angle, it’s impossible to run it down the length of a plank or board. A miter saw is intended for crosscutting wood, not ripping it — even in its traditional application.
That said, if you need to make a crosscut, the miter saw will work great. But if you are looking to do straight rip cuts, check out one of the other cutting methods in this blog post that might be better for your project.
Blade choice is critical for controlled, precise cuts on your miter saw. We recommend using a blade with a high tooth-per-inch count, which prevents tear-out while cutting. That’s why it’s advisable to use an 80-tooth blade as opposed to a 60-tooth blade — it leaves clean cuts, with no splintering or chipping around the edges.
Miter saws use special blades, with a negative or zero-rake angle. These blades have a steep angle to optimize cutting speed. They also don’t trap wood under the cut, which can cause damage to the blade, as well as making it hard for the user to unclog the blade assembly at the end of a cut.
By Using Circular Saw To Cut Vinyl Plank Flooring
Circular saws can cut vinyl flooring successfully, with a few precautions. If your job is to install new vinyl floors in an entire house, you’ll simply want to line up a production schedule and get busy. If you’re just doing small patches to an existing floor, however, the process is much simpler. Read on for more information about cutting vinyl flooring with circular saws.
Circular Saws are the ultimate solution for all you DIY types out there. These cordless power tools comprise a circular saw blade that spins at incredible speeds across a metal blade guard. The circular blade is kept under tension by a spring to keep it taut at all times. Circular saws are used by an extensive cross-section of DIY enthusiasts both in the workshop and at home.
Invest in a circular saw with a good blade to make sure your cuts are smooth. The thinner your cuts are, the easier it is to work with. It’s also important to clamp the plank to a surface to keep it as secure as possible while cutting — you might want to use two clamps instead of just one to achieve the best result.
There are many handheld circular saws currently available on the market. Handheld circular saws are not only more portable than their larger cousins, but also can be maneuvered for harder to reach cuts and angles. However, the smaller blade diameter and lighter weight of a handheld circular saw brings limitations to its use. It is typically used for simple trim work and small cutting tasks.
Installing vinyl plank flooring is a minor DIY project that can be done by anyone. It’s ideal if you have the space to install it outside, but a garage or workshop is fine too. Don’t forget to wear safety equipment when using a circular saw for cutting, and don’t forget to wear earplugs.
By Using Dremel To Cut Vinyl Plank Flooring
With the Dremel Trio, you can cut your own vinyl flooring into whatever shape you desire. Whether you have a big space that requires long planks of laminate or you’re cutting two pieces to fit around a table, the Dremel Trio can create any design you want.
This tool is perfect for creating detailed cuts in hardwoods, even though it doesn’t have a blade guard. It’s great for cutting around trim and molding, but not so great for crosscuts. For those kinds of cuts, use the circular saw or jigsaw.
The Dremel Saw Max is more versatile than the Trio. The Dremel Saw Max comes with a straightedge, which allows you to make crosscuts and rip cuts on your vinyl flooring job as long as you guide it along the cutline.
Steps By Steps Guide For Cutting Vinyl Plank Flooring
To cut vinyl planks with a utility knife, you will need to follow a few basic steps. First, locate the corner of your planks that you want to cut. Using the point of your utility knife, gently lift up one corner at a time until the entire plank is lifted off and the adhesive side faces upward . With the help of a straight edge or ruler, align one side of your utility knife against an edge on your planks.
Let’s See the following steps:
Step 1: Measure twice, cut once. The most basic rule of do-it-yourself projects and carpentry is to measure twice, cut once. An accurate measurement gives you the best result, and reduces the number of pieces you will have to cut to fix a mistake. When measuring, use your carpenter’s square and a measuring tape to ensure accuracy.
Step 2: A straight edge is your best tool for making a perfectly accurate cut. When using a snap line, place your straight edge along the chalk and make sure it’s flush with the surface of the wood. Using a tape measure to determine the length, mark two points equally apart from the line. Then, place your straight edge at the first point and draw through to the second point.
Step 3: Press your utility knife’s tip into the vinyl deeply enough to cut through the material. Then, pull the knife towards you, exerting pressure and following along your pre-marked line.
Step 4: To cut the vinyl, place it facedown on a cutting mat. Score the design with a sharp pair of scissors, being very careful not to lift the blade out of the mat. Once you’ve finished cutting, you may want to run the piece over an emery board. This will smooth the edges and make them easier to apply. The vinyl will last longer if you don’t stretch it too far while applying.
Cutting a plank to length is quick and easy with one simple trick — using a utility knife.
The most cumbersome cut on a vinyl plank would be a rip cut, which goes from the plank’s edge all the way to the centre along its length. But you can complete this cut quickly and easily by using a utility knife.
How To Cut Curves In Vinyl Plank Flooring
When you’re cutting curves in flooring, it’s a little more complicated than just straight crosscuts and rip cuts. You have to start by breaking the two end cuts in the flooring (the crosscuts), then cutting the bottom (the rip cut) of the notch at the end.
To make curved cuts in vinyl plank flooring, you can use aviation snips or tin snips. Aviation snips are a special type of tin snips that have pointed jaws to allow for detail-oriented cutting. Additionally, aviation snips do not require you to snap the seams which makes it easy to get tight curves and holes. If you are using traditional tin snips, it helps to snap the plank with pliers.
How To Cut Vinyl Flooring With Utility Knife
Vinyl flooring is often touted as the easiest to install, but not many people know that it can also be cut with a utility knife. This method may not be ideal for all sizes or purposes, but it is useful if you want to create custom shapes.
Removing any furniture from the room that you plan on working in and laying down newspaper or a drop cloth is a good idea. This will protect your flooring and it’s easier to keep a clean workspace. Additionally, having everything within arm’s reach is much easier on the back.
Before laying out your vinyl plank flooring, make sure it’s all flat.
It’s best to lay it out in the sun to let it get warm and flatten naturally, but if you have to go ahead and lay out a cold piece of vinyl planks, that’s okay too.
Once the vinyl planks are laid out, use the sharp utility knife to carefully cut around the edges.
Utility knives are used to make cuts. Be careful when using this tool — you don’t want to cut yourself!
Conclusion
Vinyl, when installed correctly, is one of the most forgiving flooring materials on the market. It can be used anywhere within a home and holds up well to wear and tear, as well as water damage. This makes it an ideal candidate for DIY projects that homeowners could handle without any professional help.
Viny planks are easy to cut — even with nothing more than a saw and a utility knife that any homeowner already has. Because Viny is strong and lightweight, you can install it anywhere you want in your home — and remove if you don’t like it!
If you’re interested in vinyl plank flooring for your next home improvement project, don’t waste another moment. This is the best option for pet owners and families with children, since it’s waterproof and durable. It’s also a great choice if you want to add value to your home without having to spend a ton of money.

Hi there! I’m Sam Hendricks, and I’m a repair technician and expert. I created this website to help people like you save money and time by fixing your own appliances.
Over the years, I’ve seen people spend a lot of money on unnecessary repairs or replacements. That’s why I decided to share my expertise and create easy-to-follow guides for fixing appliances on your own.